
Originally Posted On: https://hometipsforyou.com/7-aeron-chair-adjustments-worth-making-in-your-first-week-of-use/
Quick Picks
Short on time? Here’s the whole list at a glance. Each pick is one adjustment on your Aeron, with the person it helps most.
-
1. Seat height and size fit – best for sore knees, dangling feet
-
2. PostureFit SL sacrum pad – best for slumping, tailbone ache
-
3. Lumbar pad or lower back support – best for end-of-day back pain
-
4. Tilt tension – best for light or heavy sitters
-
5. Tilt limiter – best for focused typing, call days
-
6. Arm height, width, and pivot – best for neck and shoulder tension
-
7. Seat angle and forward tilt – best for hunched, screen-leaning posture
Our top pick: start with seat height. Everything else builds on it, and a pre-owned or certified refurbished Aeron from Madison Seating arrives fully adjustable, with a 10-year warranty behind it, so you can fine-tune all seven without worry.
Most people leave their new Aeron exactly as it arrived.
That’s a mistake. The chair ships with a dozen adjustment points, and the default settings fit almost nobody.
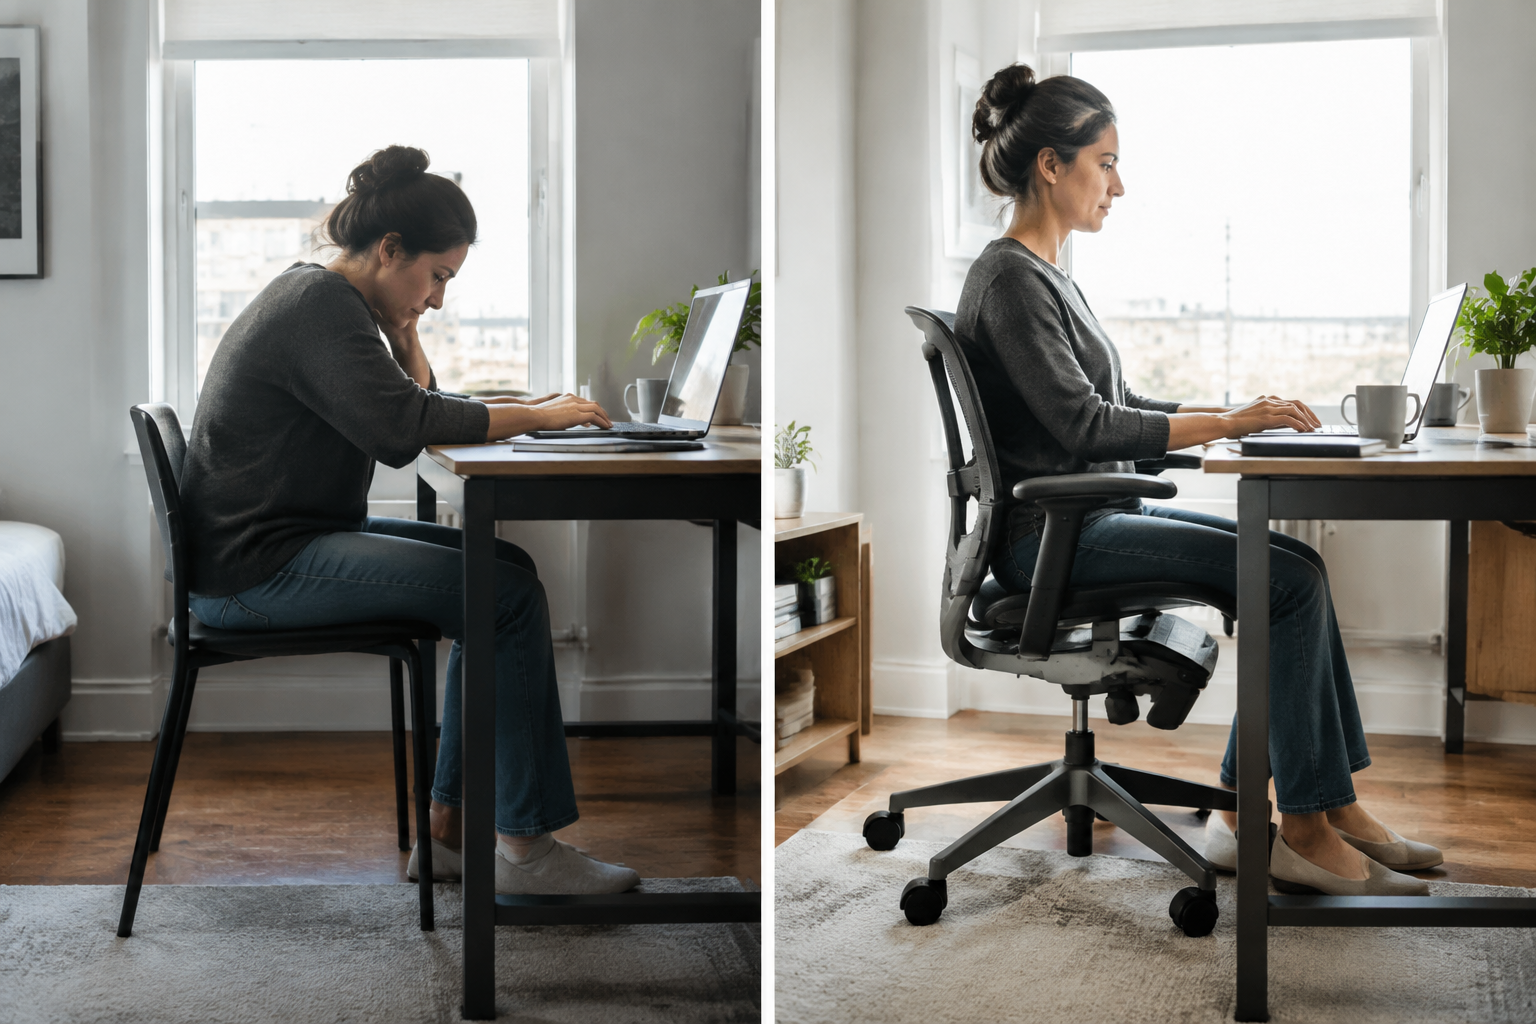
Picture the usual scene. A remote worker spends a few weeks researching, picks an Aeron over a cheaper mesh chair — sits down expecting the pain to vanish. By Friday, the lower back still aches and the shoulders are creeping up toward the ears. The chair isn’t the problem. The setup is.
After 22 years of fitting thousands of people into office chairs, I can tell you the first five days decide whether an Aeron feels like a revelation or an expensive disappointment. Your body needs time to stop slouching, and the chair needs to be set so it gives your spine something worth leaning on. Get that wrong, and you’ll blame the mesh.
So what should you touch first, and what can wait? Seven adjustments matter most. Some take ten seconds. A couple takes a day or two of trial and error (yes, really). All of them are worth doing before you decide how you feel about the chair.
Why Your First Week With a Herman Miller Aeron Matters (and How These 7 Adjustments Were Picked)
A remote analyst unboxes her chair on Monday, drops into it, and leaves every lever alone. By Friday, her shoulders ache, and she blames the chair. Sound familiar? The chair wasn’t the problem. The setup was.
What the Aeron Does Differently From Cheaper Ergonomic Chairs
Most budget chairs offer foam, a lever or two, and a fixed back. The Aeron works another way. Its 8Z Pellicle mesh has eight tension zones, so your sit bones and thighs get different support. The PostureFit SL pads cradle the sacrum and lower spine separately. Arms move four ways. That’s a lot of dials, and they only help once they’re set. Buy Herman Miller Aeron chair option, whether pre-owned or new, means you’re paying for adjustability that needs a little attention up front.
Selection Criteria: Anatomy First, Fiddling Last
Every adjustment on this list passed three tests:
-
Body contact: it changes where the chair touches your spine, hips, thighs, or forearms.
-
Fast payoff: you’ll feel it within a day or two.
-
Low effort: it takes minutes, no tools.
Cosmetic tweaks didn’t make it. Neither did anything that depends on your desk brand.
1. Start With Seat Height and Size Fit: Check Your Aeron Size Chart Match
Size comes first. Everything else fails if the chair is wrong for your frame. Anyone shopping for an Aeron Herman Miller model should confirm the size before touching a single lever.
Aeron Size A, B, and C: Quick Sizing Reference
The Aeron size chart is simple once you see it. In 22 years of fitting people, Size B covers roughly 70% of them. Check where you land:
-
Size A (small): 4’10” to 5’7″, under 130 lbs, 16″ seat depth.
-
Size B (medium): 5’3″ to 6’2″, 130 to 230 lbs, 16.5″ seat depth.
-
Size C (large): 5’9″ to 6’6″, over 200 lbs, 17.5″ seat depth.
Buying a herman miller classic aeron office chair that’s pre-owned or refurbished? The same chart applies. Sizing doesn’t change with age.
Setting Seat Height So Your Feet and Thighs Land Right
Sit all the way back. Now raise or lower the pneumatic lever until your feet rest flat — your thighs run parallel to the floor. Knees should sit near hip level.
Too high? Your heels dangle and the seat edge presses behind your knees. Too low? Your hips tip backward and your lower back flattens.
Get this one right before moving on.
Dial In PostureFit SL or Adjustable Lumbar Support (Adjustments 2 and 3)
Is the back pad actually touching the right part of your spine? Most new owners never check. They sit down, feel something pushing, and leave it alone.
Sacrum and Lower Back: Where the Pads Should Sit
PostureFit SL uses two pads. One cradles the sacrum, the flat bone at the base of the spine. The other supports the lumbar curve just above it. The knob adjusts how firmly they push. Start light, then add pressure until the pelvis tips slightly forward — the chest opens up (it should feel like support, not a shove). Chairs from Madison Seating arrive with every adjustment tested, so the knob moves smoothly from the start.
Models with the strap-style lumbar pad work differently. Slide the pad until it fills the hollow of your lower back. Not your ribs. Not your hips.
Classic vs Remastered Aeron: What Changed in the Back Support
The classic Aeron offered the strap lumbar pad or an early PostureFit. The remastered version, released in 2016, refined PostureFit SL and reshaped the 8Z Pellicle mesh with tension zones that follow the spine more closely. Here’s the quick difference:
-
Classic: Simpler pad, often adjustable only by height.
-
Remastered: Dual-pad sacrum and lumbar control, plus a sloped mesh.
Either one works if it’s set correctly.
A Herman Miller Aeron B suits roughly 70% of users, so check the size before fussing with the pads.
3. Set Tilt, Tension, and Tilt Limiter for Your Body Weight (Adjustments 4 and 5)
Roughly 70% of Aeron owners never touch the tension knob after unboxing. That’s a problem. The Harmonic 2 tilt mechanism ships set for an average sitter, and most people aren’t average.
Start with tension, which is adjustment 4.
Sit upright, then lean back. If the backrest slams down, turn the knob toward the plus side. If you have to shove yourself to recline, back it off. You want the chair to follow you with light pressure, not fight you. A lighter person on the aeron chair size b usually ends up with a very different setting than a 220-pound user on the same frame.
Now the tilt limiter, adjustment 5. It sets how far back the chair can go, and it has three positions:
-
Upright: best for typing and mouse-heavy work.
-
Middle: a good default for mixed days of email and calls.
-
Full recline: for reading or thinking, not for keyboard work.
Here’s what most people miss: recline opens the hip angle and takes pressure off the lumbar discs. So don’t lock yourself upright all day. Change positions every hour or so (your spine likes variety). Give each setting three or four days, then keep what feels natural.
4. Position the Arms and Check Seat Angle and Forward Tilt (Adjustments 6 and 7)
Arm Height, Width, Depth, and Pivot for Home Desk Typing
Lower arms aren’t better arms. Most people crank them down out of the way, and that’s exactly where shoulder tension starts. An Aeron’s arms are there to hold your forearms, so a loose setup defeats the point.
On a fully loaded unit, like the herman miller aeron basic chair size b carbon, you get four moves. Use them in this order:
-
Height: Raise the pads until your elbows sit at about 90 degrees and your shoulders drop. If you’re shrugging, they’re too high.
-
Width: Slide them in so your upper arms hang straight down. No flaring.
-
Depth: Push the pads forward when you type, back when you lean into a call.
-
Pivot: Angle them inward a few degrees so your wrists stay straight on the keyboard.
Here’s what most home desk users miss: the desk edge matters. If the arms bang into it, the chair can’t tuck in, and you’ll perch forward with a rounded back. Check that the pads slide under the desktop.
Test it for ten minutes of real typing. Relaxed neck? Good. Still tight? Drop the height a quarter inch and try again.
5. Common First-Week Mistakes: Refurbished and Pre-Owned Aeron Owners, Reddit Questions, and Adjustment Fixes
Is Your Pre-Owned Aeron Set Up Right? What a Certified Refurbished Chair Should Feel Like
A remote worker unboxes a pre-owned Aeron on Monday, drops into it, and spends four days leaning back with the tilt too loose. By Friday, she’s posting on Reddit asking if the chair is defective. It isn’t. The setup is off.
A certified refurbished chair, like a Herman Miller Aeron Basic chair, should move smoothly right out of the box. Nothing should wobble, stick, or squeak. If it does, that’s a warranty conversation, not a posture problem.
Here’s what a properly working Aeron feels like:
-
Seat height: feet flat, thighs level, no pressure behind the knees.
-
Tilt tension: the chair follows your lean without dumping you backward or fighting you.
-
Mesh: firm and even, with no sagging spots or loose edges.
-
Arms: they lift and lock without grinding.
But here’s the thing most new owners miss. Size matters more than any knob. Size B fits roughly 70% of people, while a Size A or C user will fight the chair all week, whatever the settings.
Test every lever on day one. Then adjust one setting at a time. Changing five at once tells you nothing about what helped.
6. Our Top Pick and How to Choose Where to Start: Which Adjustment Fixes the Most Pain Fastest
Start with seat height.
Every time. It’s the one setting that changes where your hips, knees, and spine land before anything else can work.
Here’s the logic: anatomy first. Your feet need to sit flat, with thighs roughly parallel to the floor. If they don’t, the pelvis rolls backward, and the lower back collapses into a C-curve. No lumbar pad fixes that. Get the base right, and the rest of the Herman Miller Aeron lumbar chair setup finally does its job.
Our top pick: PostureFit SL. If lower back ache is your main complaint, this is the adjustment to dial in second. The dual pads support the sacrum and the lumbar curve separately, and a few turns of the knob can change how your afternoon feels.
So what’s the order? Try this:
-
Seat height — feet flat, thighs level.
-
Lumbar or PostureFit SL — firm contact, never a shove.
-
Tilt tension — you should recline without fighting the chair.
-
Arm height — shoulders relaxed, elbows at about 90 degrees.
Give each change two or three days before touching the next. Your body needs that long to adapt (muscles complain before they improve).
A new Aeron doesn’t fix anyone’s back on day one. The chair just sets the stage. What matters is how the owner sets it up, and the first week is when that habit forms.
Start with the basics. Seat height and size fit decide whether everything else works, because a chair that’s too big or too small can’t be rescued by fiddling with knobs. After that, the lumbar pads and tilt tension do the heavy lifting for the spine. Arms come last, and they’re the finishing touch that takes shoulder strain off during long typing sessions. Skip any step and the chair feels merely okay. Get them all right and it feels built for one person.
For remote and hybrid professionals weighing an Aeron against cheaper chairs, Madison Seating makes the premium route realistic. Each authentic, certified pre-owned Aeron passes a 127-point inspection and carries a 10-year warranty, plus a 30-day money-back guarantee.
Your next step is simple. Measure your height and weight, match them to Size A, B, or C, and browse Madison Seating’s certified Aeron inventory today.


